The word “biscornu” is derived from a French adjective meaning odd or bizarre. They are lovely projects, and can be used as pincushions, or smaller ones as scissor fobs or even needle minders if you put a small magnet inside.
The pattern featured in this tutorial is from Lord Libidan, and it can be downloaded below this blog post. His design is based on Japanese sashiko, it’s a really lovely simple design using just backstitch. For the sample I use in the tutorial, I’ve used 14 count linen Aida from Zweigart and DMC 817, the Aida gives it such a pretty rustic effect. The video tutorial is below the instructional notes (and I apologize for sometimes my hands getting too high in the video, it’s very tricky trying to do detailed work while looking through a screen.) ❤️
Assembling a biscornu

- The first thing to do after stitching is to wash and iron your panels (but be careful if you’re using hand dyed fabric or floss). Then trim the panels down to about 1 cm (a half inch) or so along all edges. Also make sure to clip the corners to allow for ease of turning (don’t clip too close to the stitching).
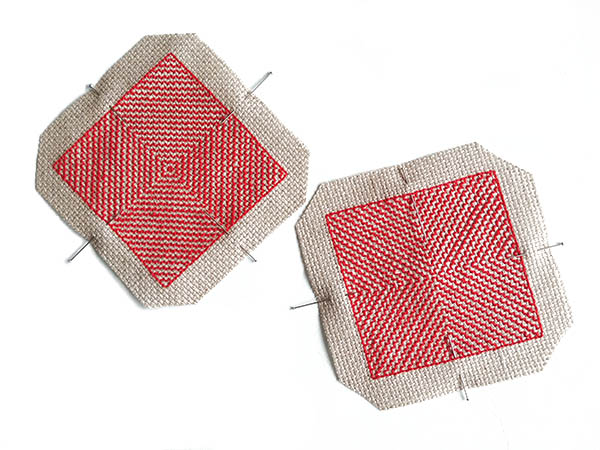
- Next, place pins at the exact halfway point of each side of both panels. This pattern is an uneven number, so looking at the top of each panel, there are 21 stitches on the left side, and 20 to the right. As long as you do this for each side (turn the panels as you’re pinning), it will come out ok. You’ll see in this pattern, on two sides the zigzag lines will line up perfectly, and on two sides they’ll alternate.
- Once the panels are pinned, you can pin the panels together, with the seams facing in. The panels will be offset, you’ll be matching each stitch up to the other panel.
- Use the loop method to connect the two panels, and start using a whipstitch to join each thread of the backstitch outline to the other. The stitches must line up, and your needle goes under and over the backstitch. Make sure to not pierce the backstitch with your needle, and don’t pick up the fabric with your needle either.
- Carefully turn at the corner, tucking up your seam allowance and folding it under. Line up your next section, and keep stitching. The offset panels create the distinctive “buckled” shape of a biscornu.
- To finish, before stitching up the last seam stuff the biscornu with batting or stuffing, and you can stitch a bead or button to both sides to pull the two sides together.
Blinging up your biscornu
You can add beads along the whipstitch as you go (like on each corner, or every second stitch). I tend to use a special beading needle that’s a little too flexible to do whipstitch with so I added the beads after completion (and buried the end of the thread in the biscornu).
Video: biscornu assembly tutorial

6 Responses
Loretta
I have a few biscornus stitched up that I haven’t been brave enough to attempt assembly on yet. Thanks for the tips and the video 🙂
Dana Batho
You’re very welcome Loretta, glad it helped! 🙂
Diana Nelson
Loved your tutorial and will be making my first Biscornu soon.
Dana Batho
Awesome, glad to hear it Diana! 🙂
Angel
This is so cute. Love having a tutorial. so I could see the importance of matching the edges. The four panels would be great to stitch while traveling. Thanks for a cute project and an excellent tutorial.
Dana Batho
You’re very welcome Angel, I’m glad you like it! Feel free to head over to Lord Libidan’s site at lordlibidan.com and give him a shout out for a great pattern, I know he’ll love it. 🙂