I was online this week participating in one of my cross stitch Facebook groups, and several people were asking how to anchor their thread. I mentioned that I use the loop method to start, and a pin stitch to finish. A few in the conversation didn’t know what a pin stitch was. Up until a few months ago,I didn’t know what it was either (or the loop method). But I started reading more about cross stitch and following along with several Facebook groups, and I learned a lot. After a discussion about the loop method to start and a pin stitch to end, I looked these techniques up. I quickly learned how to do them, and between the loop method and the pin stitch, they save me so much time. As an added bonus, they don’t leave lumps on the back of the fabric. I also don’t have to ever flip my sewing frame over, as I can do both from the front of the fabric. This is so great, with a neck injury it can be really difficult to have to keep flipping over a big sewing frame. Now the only time I need to flip my project over is if I’ve gotten a giant knot of floss on the back of my project. Thankfully, that’s pretty rare, so I can work mainly from the front of my piece only.
What about you, how do you prefer to anchor your threads? Let me know in the comments below!


27 Responses
JOYCE ESTLE
I too have always used the loop method but in showing or telling others, I didn’t know how to describe it. You did awesome. Now the “pin” method I have never heard of. I plan to start stitching tonight & can’t wait to try it. You are an awesome teacher & I am so glad I am on this site & I have no doubt you are great at everything you do (artist, vet, stitcher, teacher & especially “mom”)!
Dana Batho
Thanks so much Joyce, glad to hear you enjoyed the tutorial! Unfortunately this Mother’s Day was my first not being a furry mama, Coco passed away last August. ❤️
Debbie Mathisen
I started using the loop method to start the thread years ago on my own. Just seemed like an easier method. I am going to try the pin stitch to end the thread now. I definitely see how that would leave the back a little neater. Thanks for the idea.
Dana Batho
You’re very welcome Debbie! 🙂
Sue
does the loop method work when you need two different colors to be blended in one stitch
Dana Batho
Hi Sue! I thought I covered that in the tutorial, sorry if I didn’t — the loop method requires you to use an even number of strands (as one long thread is folded in half, creating the loop). The only way you could blend 2 colours would be to end up with four strands to stitch with (two colours folded in half = four strands), which would be pretty thick. 🙂
Jayne
I am so excited to learn the pin stitch finish! The back of my project is looking better than ever.
I like to stitch on dishtowels and baby bibs that take multiple trips through the washing machine. How secure is a pin stitch finish? Can it survive multiple trips through the washer for years to come without unraveling?
Thanks!
Dana Batho
Hi Jayne! I don’t know how secure a pin stitch will be in the washing machine — I never put any of my stitching in the machine, to me it’s too much agitation for most stitched items. Try a mini sample on a scrap piece of fabric and put it through your next load of laundry, see how the pin stitch survives. 🙂
Shelby
So I know that most cross stitch projects use two threads, but how would you do it if it only uses one thread? I have a project on a 25 count that uses individual threads instead of two at a time.
Thanks!
Dana Batho
Hi Shelby! You have a few options. You can use a small knot, or weave the ends under nearby stitches a few times to anchor your floss. You can also do a pin stitch (that’s shown at the end of the loop method video), that will work too. For 25 count, you may want to adapt how you do the pin stitch, if you search my site for “pin stitch”, you’ll see I did a video showing how to do one on linen. I’m using Aida to demonstrate in the video (so it’s more visible), but you’ll get the idea. 🙂
Sarah
Hi Shelby,
I learned a trick recently when using the pin stitch for only a single thread: Split the thread!
As you place the needle back through the hole from which the thread emerges, make sure that the tip of the needle goes THROUGH that single thread. Do this each time you pull the needle through the fabric for the pin stitch, and it will be secure.
You may need to switch from a tapestry needle to an embroidery needle with a pointier end.
Yvonne Holmes
I would like info on how to finish the backs of cross stitched cards.
Thank you
Yvonne
Dana Batho
Hi Yvonne! I’m not sure, I don’t make cards, but I’m sure if you do a Google search you’ll find something. 🙂 I know often cross stitch magazines like Cross Stitch Crazy have little card kits in the magazine, so they’d have finishing instructions. 🙂
Britny H
I think you’ve just changed my cross stitch life forever! THANK YOU!!!!
Dana Batho
Ahahaha you’re very welcome Britny! 🙂
Janet Chambers
Thank you! I have used the loop method for years, but had never heard of the pin stitch. I’ll be trying that one tonight. Great site!
Dana Batho
Haha great, I’m glad you found a new technique! Happy stitching Janet! 🙂
Faith
Thanks! I do use the loop method and will be trying the pin stitch today! Makes everything looks really nice with no tails everywhere.
I missed where you said your website is. Can you please give me that information?
Thanks for the tip 😉
Dana Batho
Hi Faith, I’m glad the tutorial helped! And you’re on my website, if you want to look at other tutorials just click the “tutorials” tab in the menu at the top of the page, and that’s where you’ll find the shop links too. 🙂
Donna Pheneger
I just saw this video this morning. It looks like it saves so much time. I’m working on an HAED with my daughter right now and this will really help. We use a hoop and stand and it’s so much work to keep flipping back and forth all the time, especially when you have to re-adjust the stand. Thank you for a great tutorial.
Blessings, Donna
Dana Batho
Haha yes, the loop method and pin stitch are genius, they do save so much time. I can’t flip my projects if I’m using my lap stand, it’s too bulky and heavy, so I rarely have to flip it unless there’s a giant tangle of floss at the back. 🙂 Happy stitching Donna!
Jackie
I never use a frame or hoop. I use a dowel rod taped to the lower edge and roll up as I go. It makes for much faster stitching.
Dana Batho
Nice, that’s a good idea Jackie! Recently I’ve switched to stitching in hand, I just roll up my fabric in my hand. I like it, it’s a faster way to stitch. 🙂
RoseMary
The really impressive thing about the stitcher who described that method is that he does those massive HAED projects, completely in-hand. He posted that he has never used a frame, hoop or stand of any kind. He just has one hand above and one hand below and goes like the wind. I cannot remember his name, but somehow think he may live in Italy.
Dana Batho
That’s so neat, I bet his work is amazing! I’ll have to try and look him up! 🙂
RoseMary
I use the loop method you demonstrated from the top exclusively when using 2 threads. I used to turn my work and do it from the back, until I read a tip and learned there is no need to do so. Anything to save a bit of time and bulk. However, I have never been really satisfied that the pin stitch would hold well enough, so for that I flip and run it under about 4 stitches on the back.
On one of my FB groups I learned about not turning my needle. It only works properly if one is a two handed stitcher, i.e. one hand on top and one hand underneath your fabric. It can be hard to visualize when reading the instructions, so take your time and give it a go. The method is to go down as you normally do with your top hand, but do not pull all the thread all the way through to the back. Then, using your other hand, grasp the needle and move the eye over to where you need to come up. Slide the eye of the needle through your hole, grasp with your upper hand and pull thread all the way through. By keeping all your working thread on top, it helps to prevent those pesky knots in the thread that we may experience from time to time. It does speed up the stitching, and I find it is quite easy to use once learned. It was a male stitcher who described it, and apparently he can achieve quite fast stitching times with it.
Dana Batho
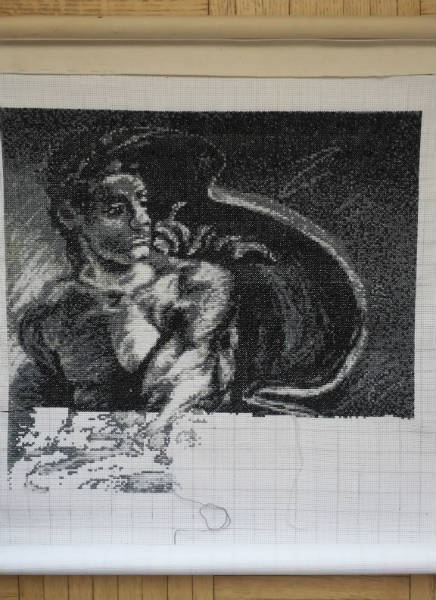
That’s a great tip RoseMary, and I can exactly visualize what you’re saying! The next time I do any stitching on my Spirit of the Sockeye pattern that’s on my scroll frame I’ll try that! For the current piece I’m working on I’m just doing it in my hands with no hoop or frame (using the sewing method). I find it does tend to twist the thread, but it’s easier on my neck and arms than holding the fabric in a hoop. 🙂